This guide will go through all steps to create a bootable USB with Windows 11 – that includes the Autopilot profile for your Microsoft Endpoint Manager tenant.
This USB can be used to onboard all computer – just after reinstall.
First you need Windows 11 ISO image – DOWNLOAD
Then you have to download the Autopilot profile to a JSON file.
Open Powershell as Administrator – and download these modules:
Install-Module AzureAD -Force
Install-Module WindowsAutopilotIntune -Force
Install-Module Microsoft.Graph.Intune -Force
Connect-MSGraph #Connect with your Intune Administrator
Now download your Autopilot profile as JSON
$AutopilotProfiles = Get-AutopilotProfile

Foreach ($AutopilotProfile in $AutopilotProfiles) {

    $TempPath = "C:\DATA\AutopilotProfiles\"

    if (!(Test-Path $TempPath)) {
        New-Item -Path $TempPath -ItemType Directory -Force
    }

    $name = $AutopilotProfile.displayName
    $ExportPath = $TempPath + $name + "_AutopilotConfigurationFile.json"
    $AutopilotProfile | ConvertTo-AutopilotConfigurationJSON | Out-File $ExportPath -Encoding ASCII

}
Following Autopilot profiles is now downloaded as JSON:
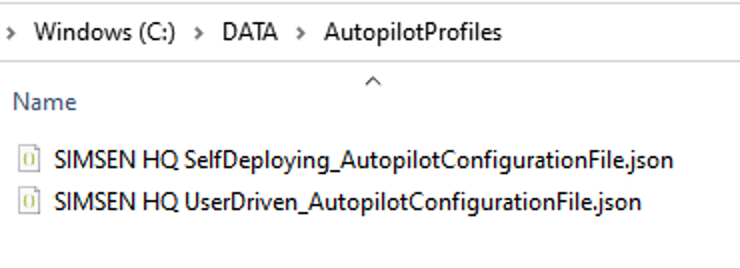
Rename the file you will use to: AutopilotConfigurationFile.json
Save the file for later use in this guide.
Now we will shrink the ISO and inject the JSON file.
We will shrink the image – so we only have Win 11 Pro on the USB.
To know what Index we will export – run this DISM command.
Point to the Install.WIM file under %ISOIMAGE%\Sources\Install.wim
Dism /get-wiminfo /wimfile:"E:\sources\install.wim"
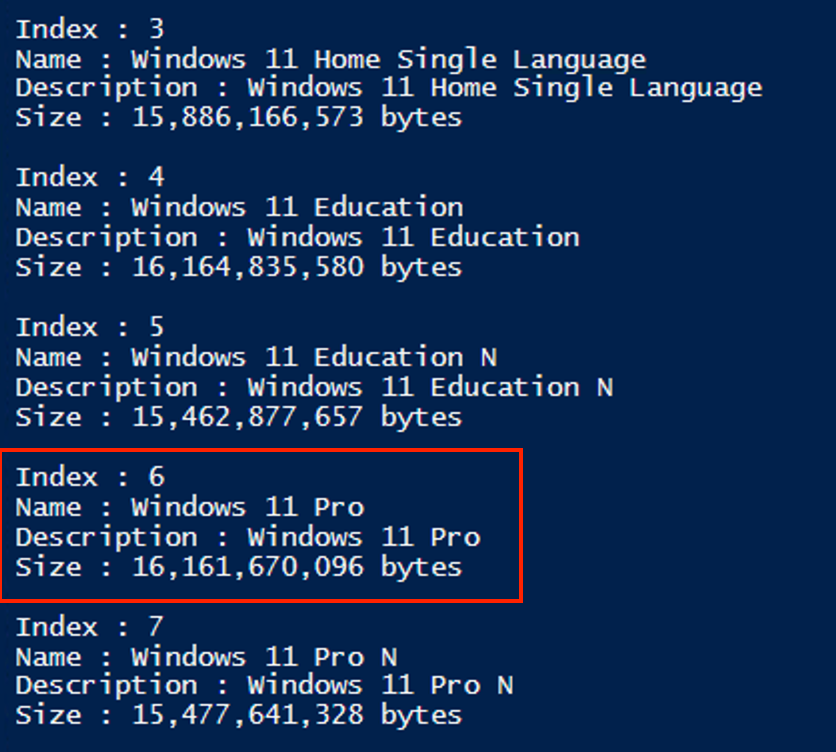
To export Index : 6 – run following DISM command
Dism /export-image /SourceImageFile:"E:\sources\install.wim" /SourceIndex:6 /DestinationImageFile:C:\DATA\WIM\install.wim /Compress:max /CheckIntegrity
Image should now be 500mb smaller – you can run get-wiminfo command again on the new WIM file to verify index.

The new WIM file need to be mounted – so we can inject the JSON file.
Run this command to mount the WIM:
Dism /mount-wim /wimfile:"C:\DATA\WIM\install.wim" /index:1 /mountdir:C:\DATA\Mount
After WIM is mounted – Copy AutopilotConfigurationFile.json to:
%MountDir%\Windows\Provisioning\Autopilot\

Now Commit the image:
Dism /Commit-Image /MountDir:C:\DATA\Mount
After Commit – Unmount image:
Dism /Unmount-Image /MountDir:C:\DATA\Mount /commit
Before we will prepare the USB – we need to split the WIM file.
This is needed as the WIM is larger then 4GB.
Otherwise it can not be saved on a FAT32 USB
Dism /Split-Image /ImageFile:"C:\DATA\WIM\install.wim" /SWMFile:"C:\DATA\SWM\install.SWM" /FileSize:3800
Now we need to prepare the USB.
Remember USB size: minimum 8GB – maximum 32GB
Insert USB.
Open Command prompt as Administrator
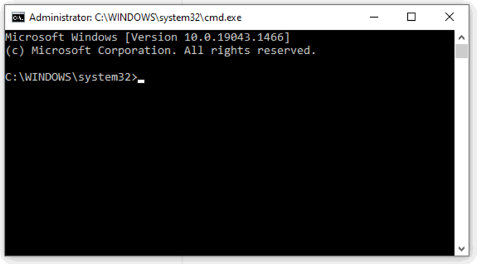
Type: Diskpart
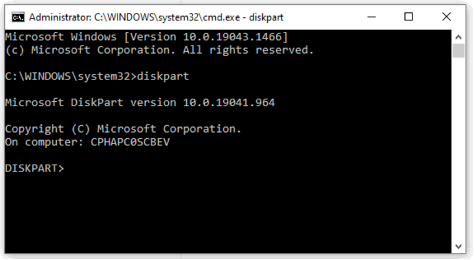
Type: List disk
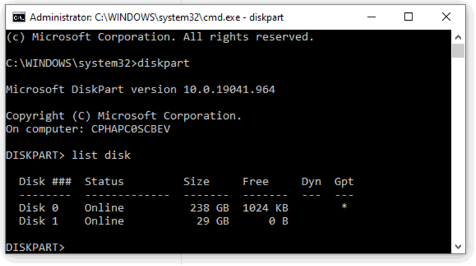
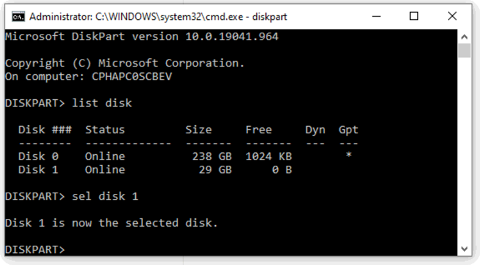
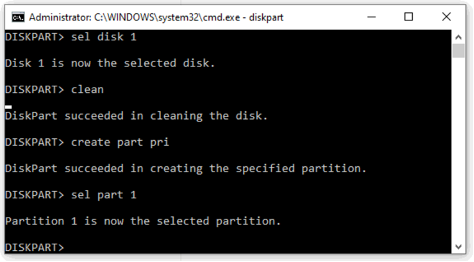
Select Disk 1 – which is the USB stick
Type: sel disk 1
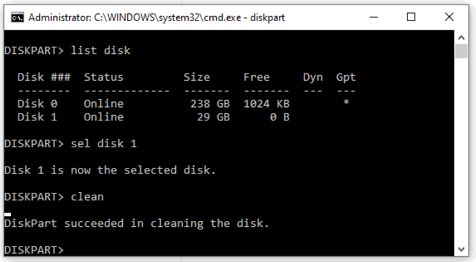
Type: clean
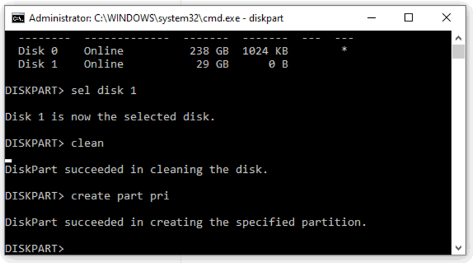
Create new partition
Type: create part pri
Select new partition
Type: sel part 1
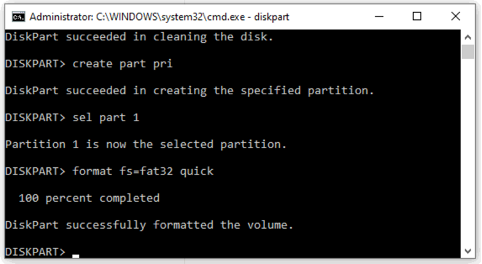
Format the USB stick
Type: format fs=fat32 quick
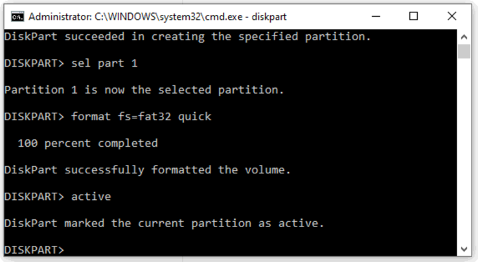
Type: active
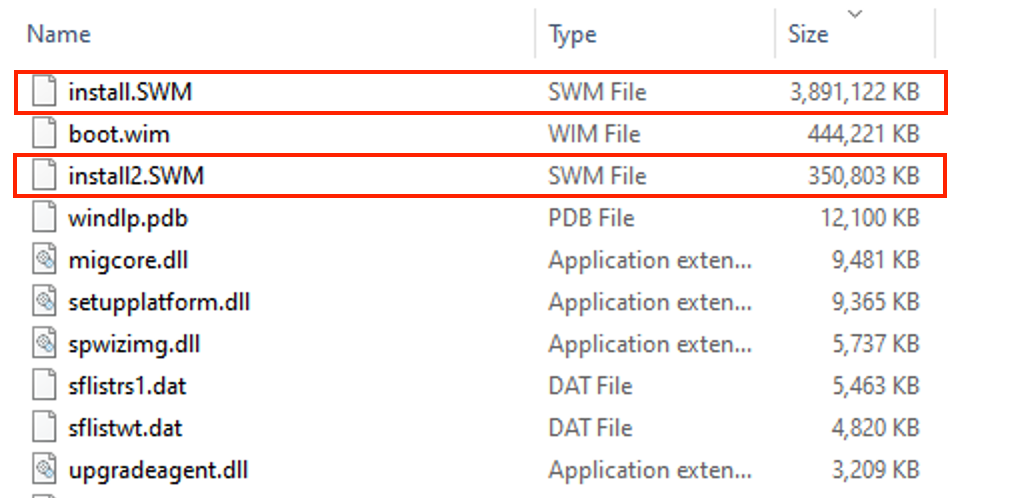
Copy all files from downloaded Windows 11 ISO to USB
Except Install.wim – Instead Install.SWM and Install2.SWM
Now reinstall your PC with the USB – and you will see it attach directly to your MEM Tenant.
Hope you could use the guide!

